
Step 1: add the form to a page
Create a page, for example “Submit an event”, and add the Submit an Event block. Or paste the shortcode:
[wp_monthly_events_submit]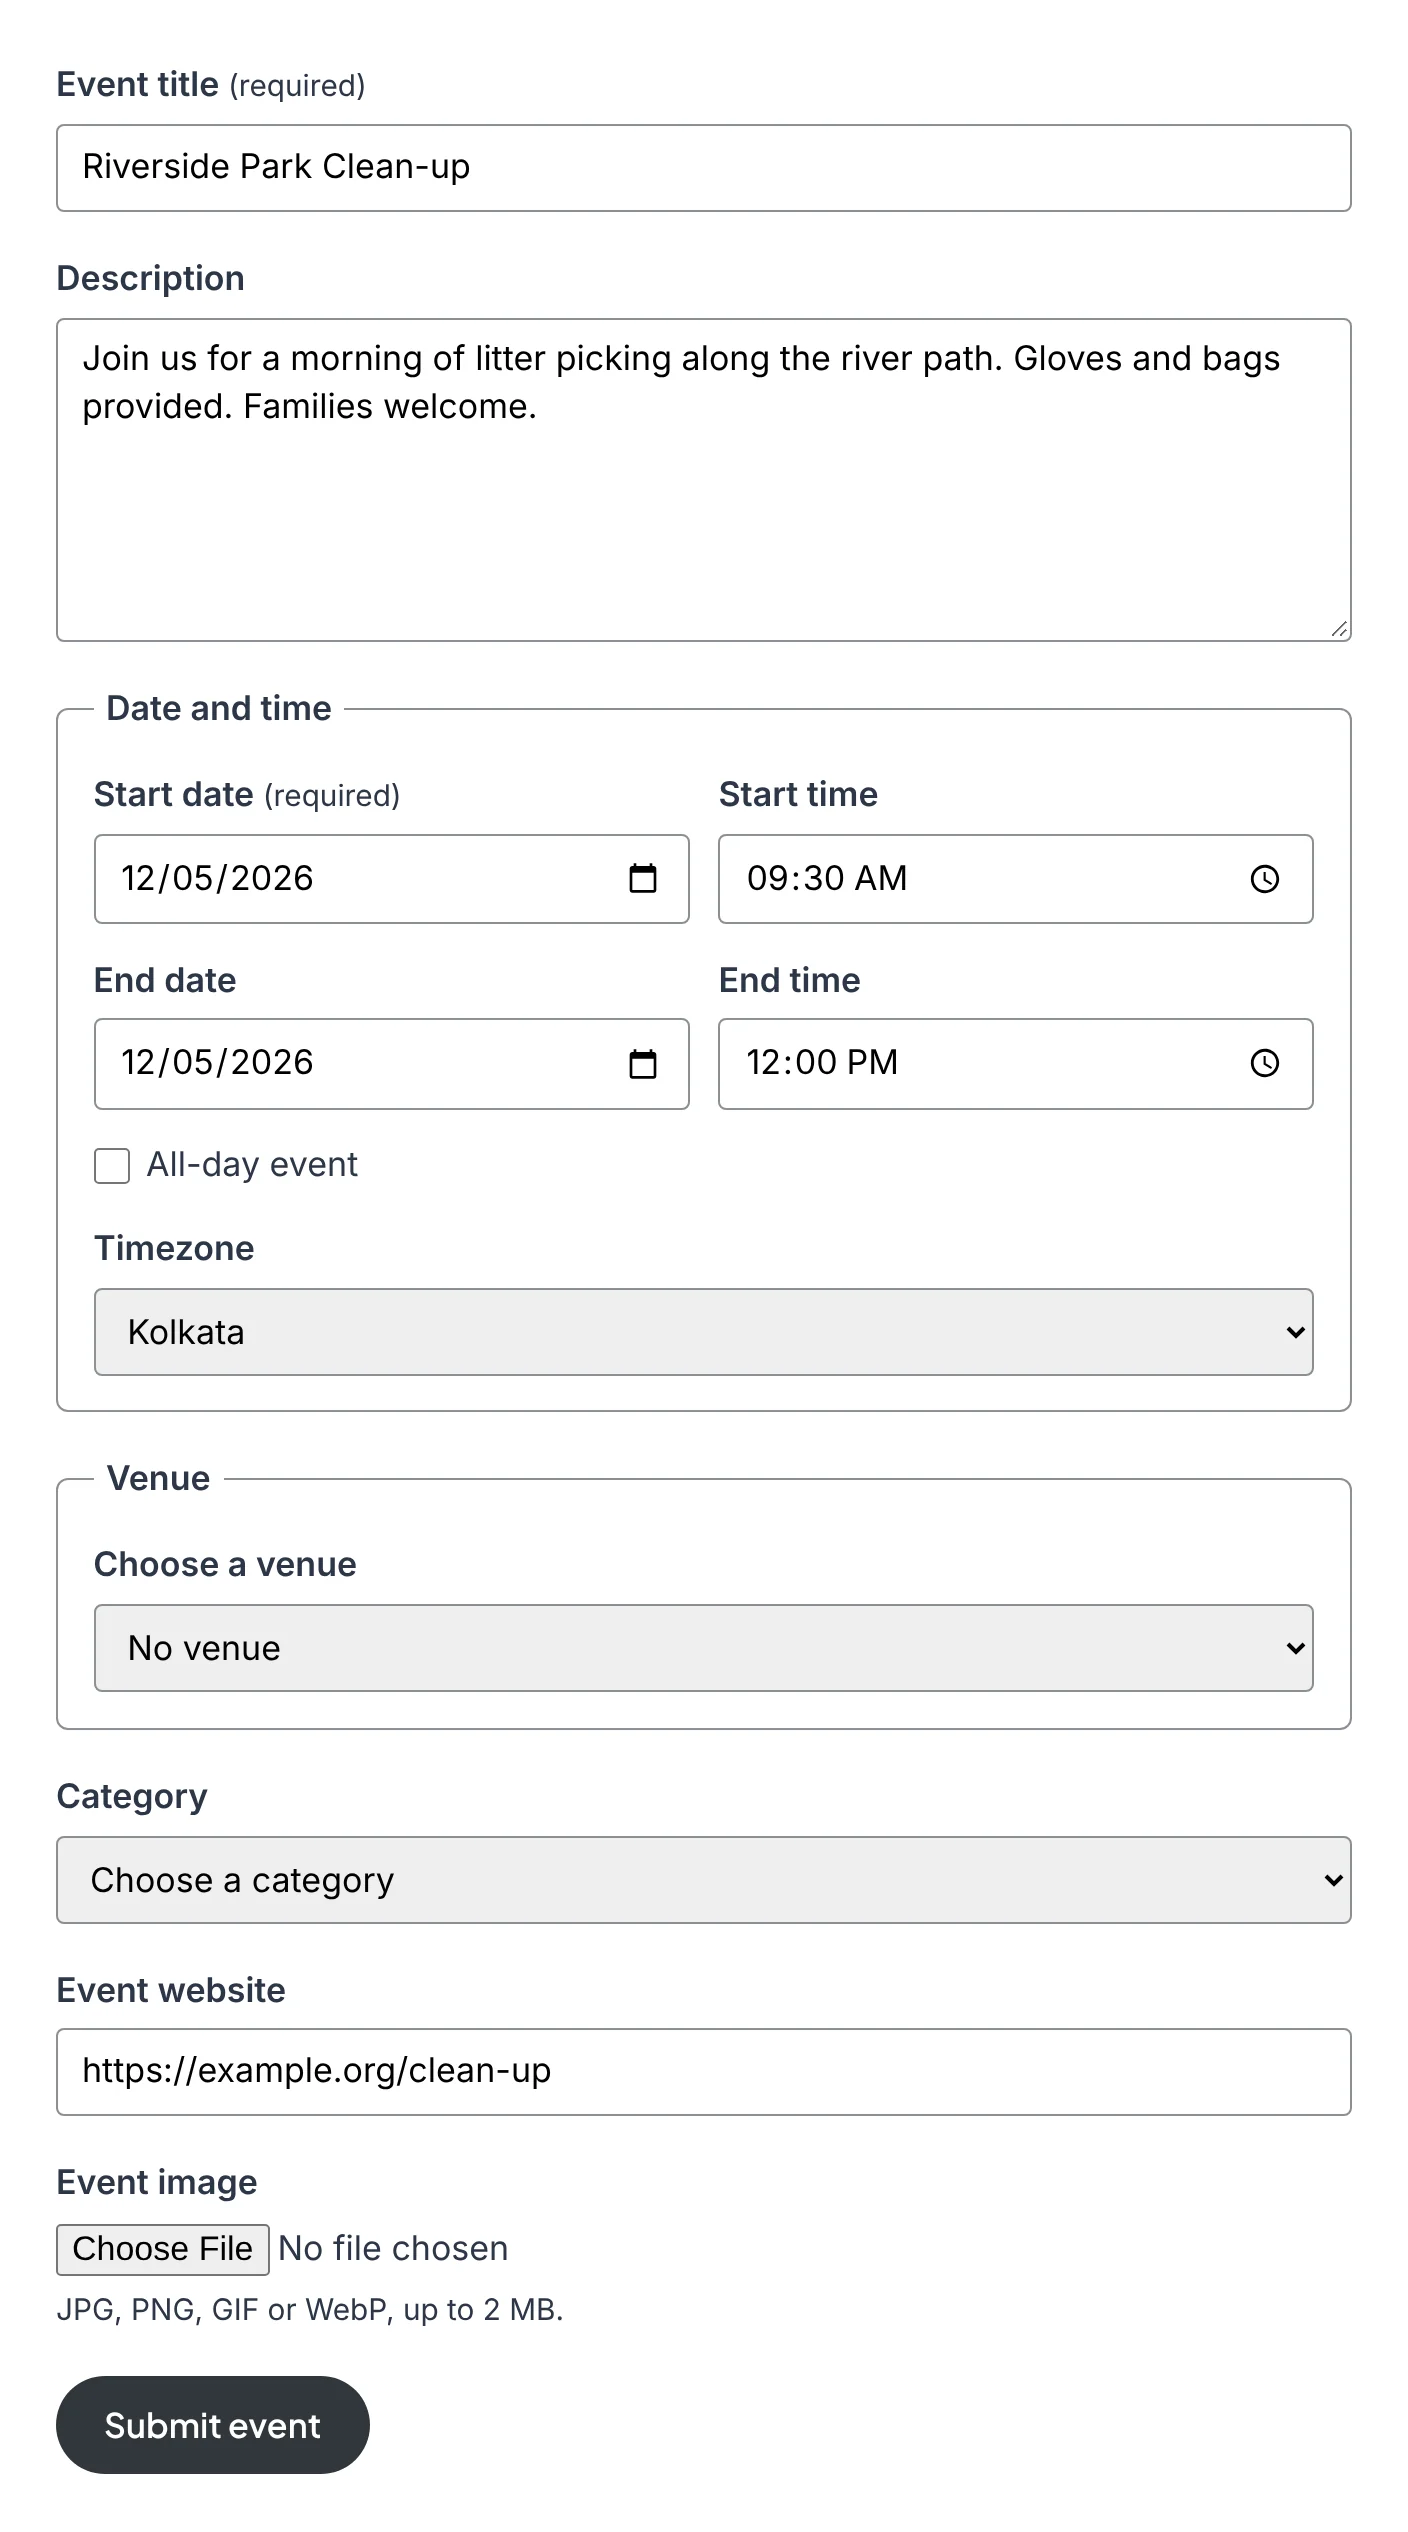
Out of the box, administrators and editors can use the form. Other people are asked to log in, or told they are not allowed to submit yet.
Step 2: choose who can submit
Go to Events Calendar → Submissions.
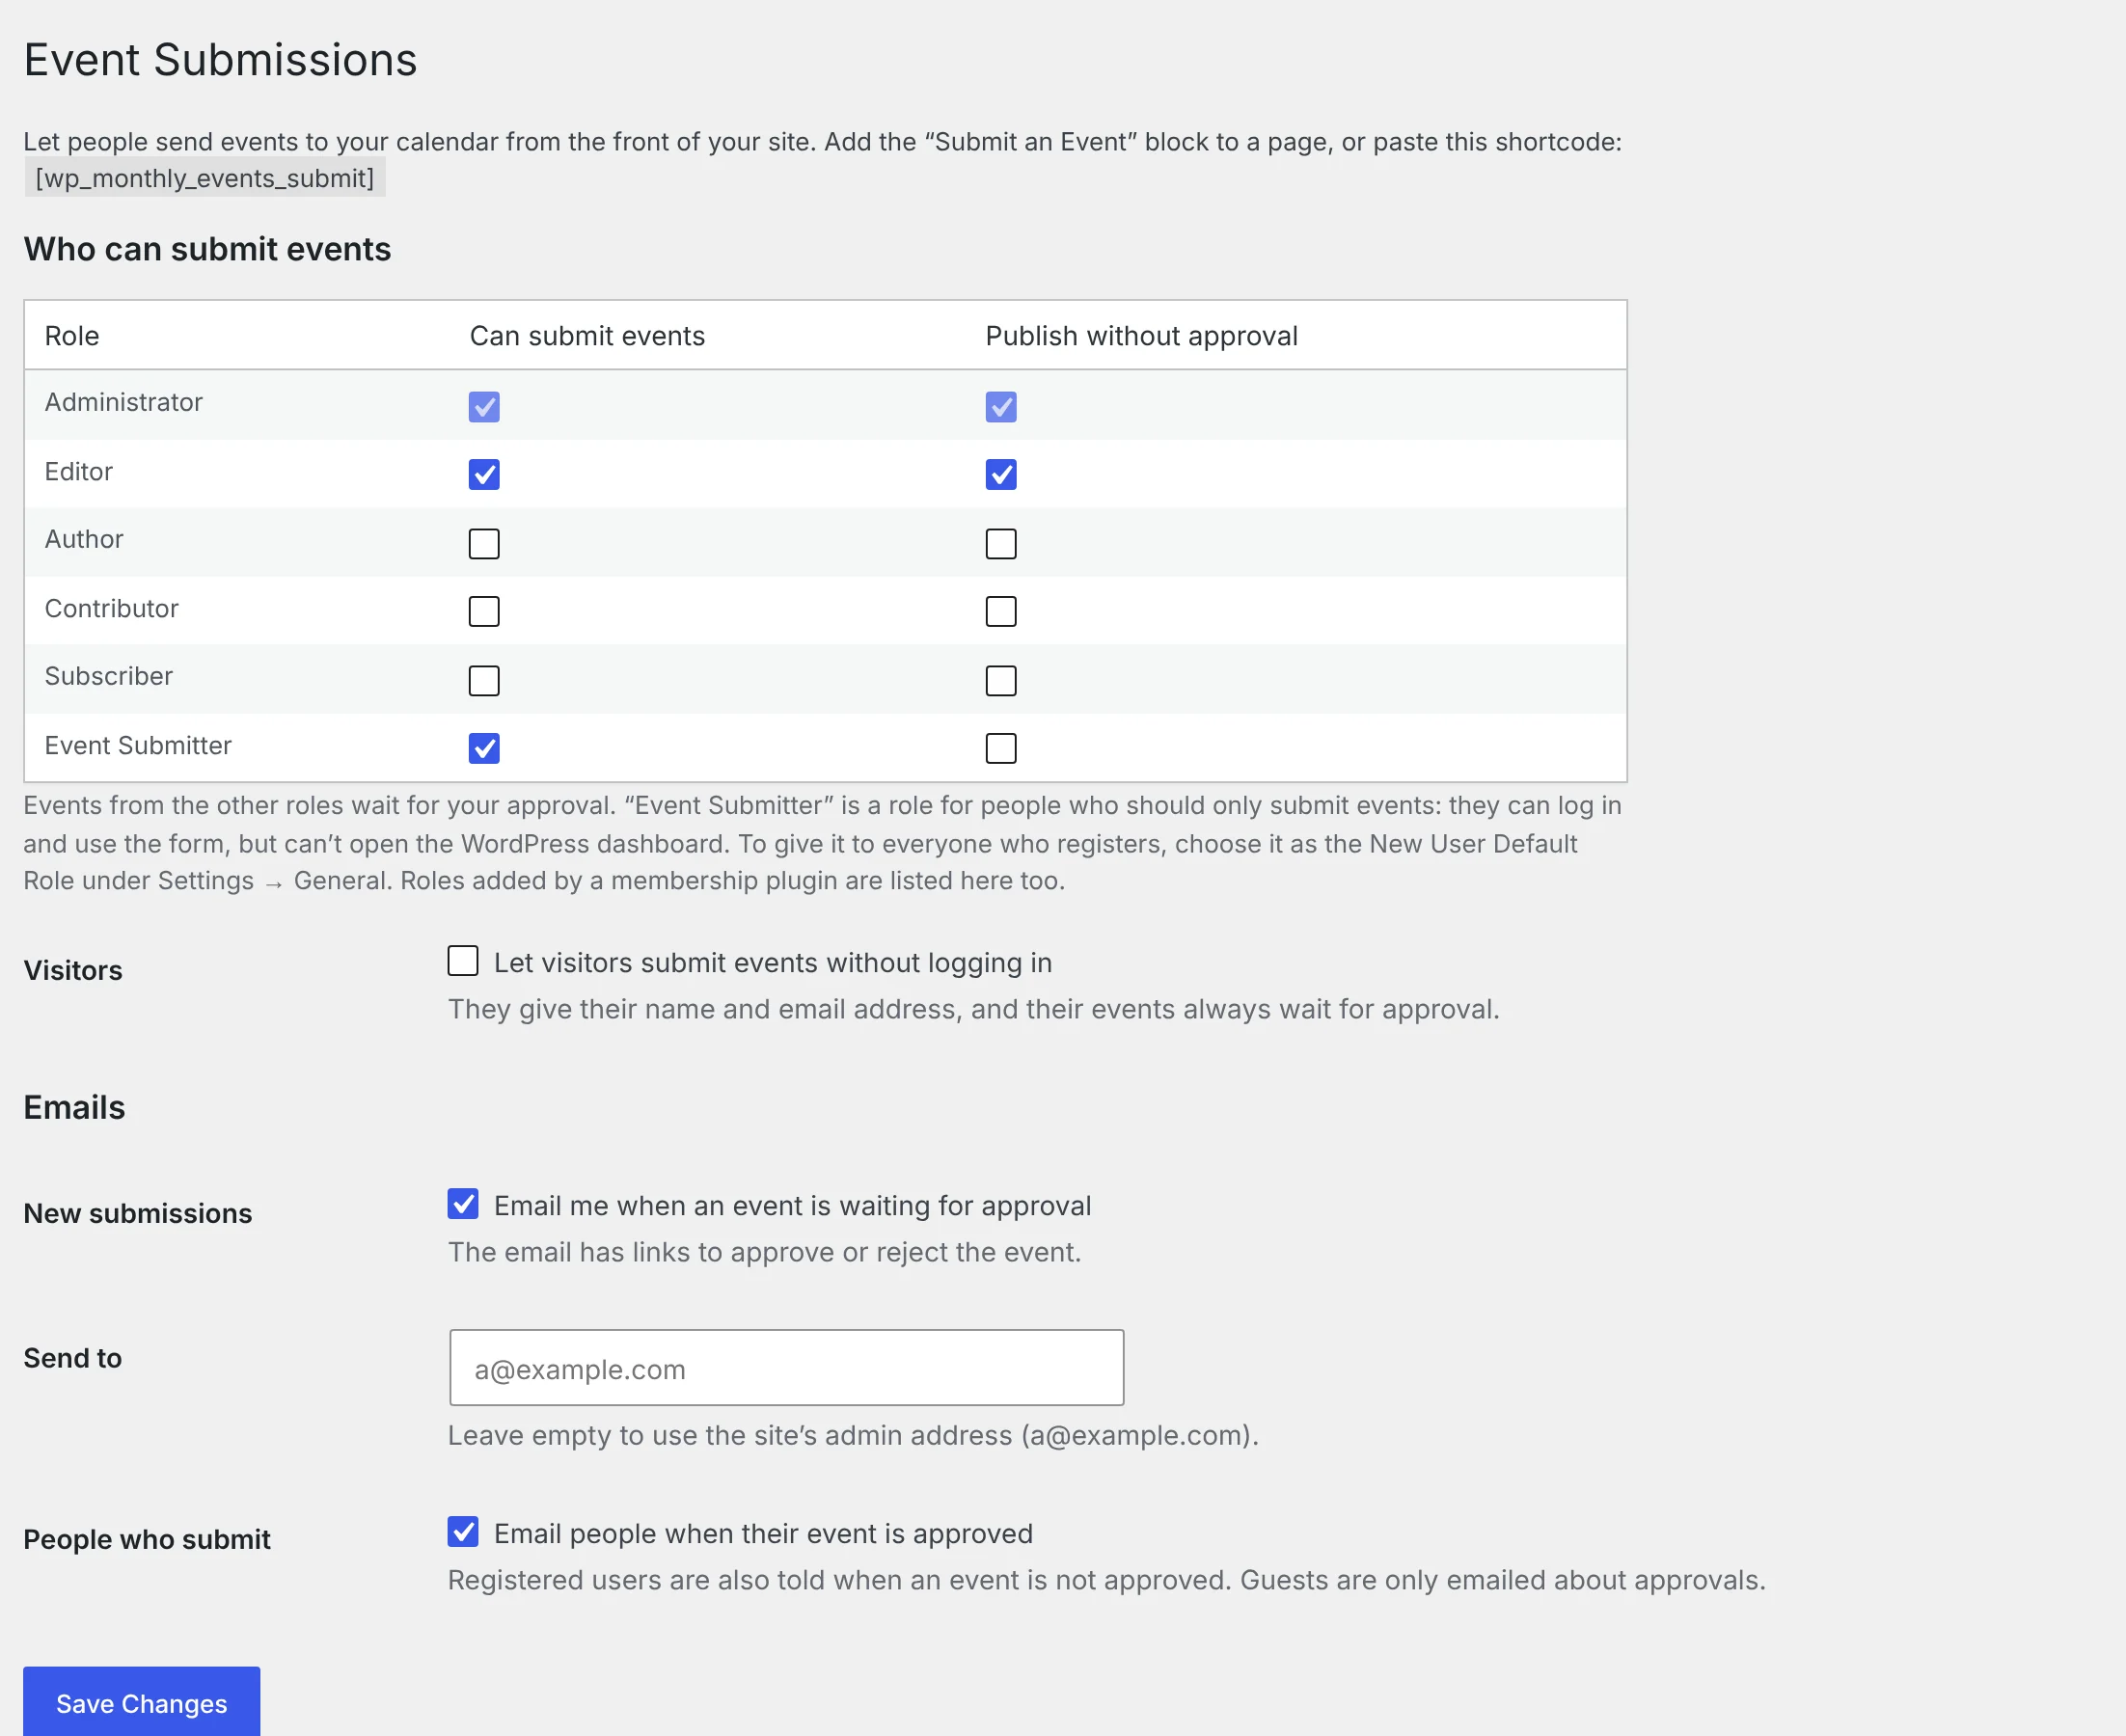
For each role, tick:
- Can submit events — people with this role can use the form.
- Publish without approval — their events go live straight away. Leave it unticked and their events wait for you.
Administrators always have both.
The Event Submitter role. The plugin adds this role for people who should only submit events. They can log in and use the form, they are sent to your home page if they try to open the dashboard, and they see no admin toolbar. To give it to everyone who registers on your site, set Settings → General → New User Default Role to Event Submitter.
Visitors. Tick Let visitors submit events without logging in to open the form to everyone. Visitors give a name and an email address, and their events always wait for approval.
Step 3: approve or reject
You get an email for each event that is waiting (you can turn this off, or send it to another address). The email has two links:
- Approve and publish
- Reject
Each link works once, and you need to be logged in as someone who can publish events.
You can also go to Events Calendar → All Events → Pending. Each submitted event shows “Submitted by” and has Approve and Reject links. Opening an event and publishing it approves it; moving it to the trash rejects it.
When you approve an event, the person who sent it gets an email with a link to it. When you reject one, registered users are told; visitors are not.
Change the form
Add options to the shortcode, or use the same settings in the block’s sidebar.
| Option | What it does | Example |
|---|---|---|
hide | Leaves out optional fields: description, timezone, venue, category, website, image | hide="timezone,website" |
category | Puts every event from this form in one category, and hides the category field | category="music" |
button | Changes the button text | button="Send my event" |
redirect | Goes to a page on your site after a successful submission | redirect="/thank-you/" |
The title and the dates are always shown.
[wp_monthly_events_submit hide="timezone,website" category="music" redirect="/thank-you/"]Venues, categories and images
- Venue: people pick an existing venue or type a new one. A new venue is published only when its event is approved.
- Category: people choose from your existing categories. They can’t create new ones.
- Image: JPG, PNG, GIF or WebP, up to 5 MB (or your server’s upload limit, if that is lower). It becomes the event’s featured image.
Spam protection
It’s built in and needs no setup:
- a hidden field that only bots fill in;
- visitors must have had the form open for a few seconds;
- an hourly limit: 10 events per visitor and 30 per logged-in user. Roles that publish without approval have no limit.
Using another form plugin
If you’d rather build the form in Gravity Forms or another form plugin, your form can create events through the plugin. See Create events from other forms.
More help: Troubleshooting · Support