
Add a new event
Go to Events Calendar → Add new Event. The screen looks like a normal WordPress post with an Event Details box underneath the editor.
- Title — what people will see in the calendar. Keep it short: month cells only have room for a few words.
- Description — the main text of the event page. Say what happens, who it’s for, what to bring and how to book.
- Event Details — dates, timezone, website and colour (see below).
- Location Details and Organizer Details — where it is and who runs it.
- Event Categories, Event Tags and a Featured image in the right-hand column.
- Click Publish. The event appears in the calendar straight away.
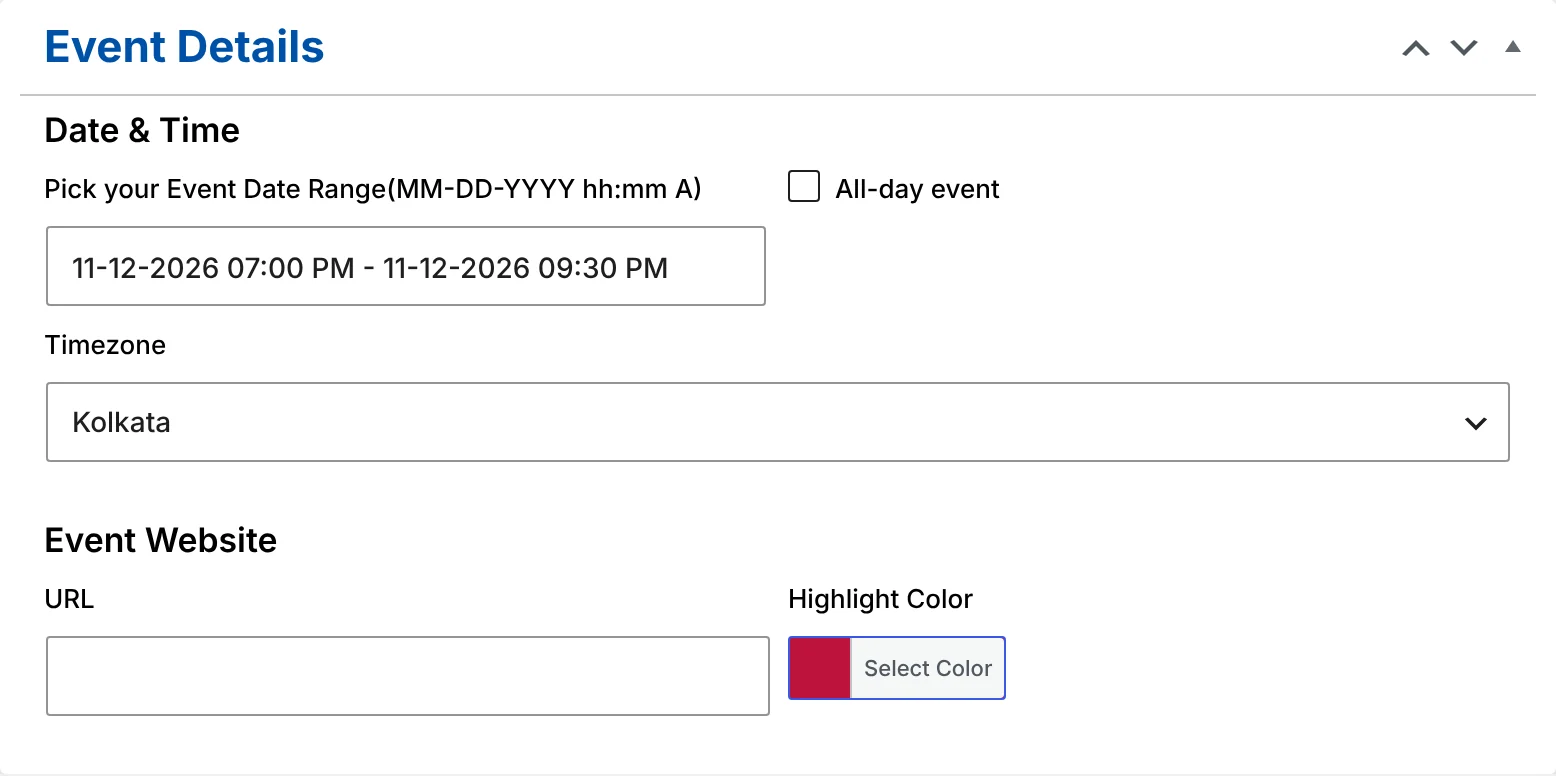
Date and time
Click the date field to open the date range picker, choose the start day and the end day, then set the times. A one-evening event starts and ends on the same day; a weekend festival spans both days. The field shows the range as MM-DD-YYYY hh:mm A, whatever date format your site uses.
All-day event: tick this for events without a start time — a holiday, an exhibition day, a deadline. All-day events stay on their calendar date for every visitor, wherever they are, and are saved as all-day entries when someone adds them to their own calendar.
Timezone
Each event has its own Timezone (new in version 1.6). It starts as the default you chose under Events Calendar → Settings, so for most sites you never touch it. Change it for an event that happens somewhere else — an online session hosted from New York on a London site, for example. Visitors see the time converted to their own timezone. How timezones work
Website and highlight colour
- URL — an optional link for the event: a ticket page, a registration form, or the external event’s own site.
- Highlight Color — the colour of the event in the month grid and of its date in the list view. Use one colour per kind of event so the calendar is easy to scan.
Venue and organizers
Under Location Details, pick a saved venue or add a new one with its address, city, state or province, country, postal code, phone and website. Under Organizer Details, add who runs the event. Both are saved for reuse — next time you only pick them from the list. Manage them under Events Calendar → Venues and Organizers. Venues and organizers
Categories, tags and image
Choose one event category for the type of event and add tags for anything else useful. Each category has its own calendar page. Categories and tags
The featured image shows in the month view’s preview card and at the top of the event page. A landscape image around 1200 × 675 pixels works well everywhere.
Edit, copy or remove an event
- Edit: Events Calendar → All Events, then click the title. Changes appear in the calendar as soon as you click Update.
- Reschedule: change the dates rather than creating a new event, so the event keeps its address and anyone who shared the link still lands in the right place.
- Cancel: add “Cancelled:” to the start of the title and a line at the top of the description, rather than deleting it straight away — people who saved the event will look for it.
- Remove: move it to the Trash. It disappears from the calendar immediately.
Check it
Open Events Calendar → Preview Calendar to see the calendar as visitors will, or view the event page itself. If an event doesn’t appear, work through troubleshooting.