Introduction
Are you looking to add an event in website’s Events Calendar? Look no further! In this guide, we will walk you through the step-by-step process of adding an event to the Events Calendar plugin.
Step 1: Accessing the Events Calendar Plugin
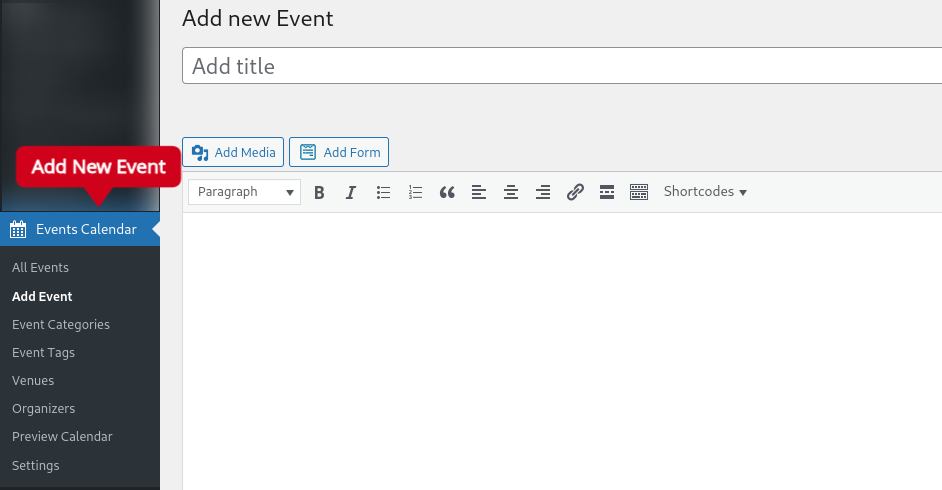
To get started, log in to your WordPress dashboard and navigate to the Events Calendar. If you don’t have the plugin installed, you can easily find and install it from the WordPress plugin repository.
Step 2: Creating a New Event
Once you have accessed the Events Calendar, click on the ‘Add Event’ button to create a new event. This will take you to the event creation page.

Step 3: Adding Event Details
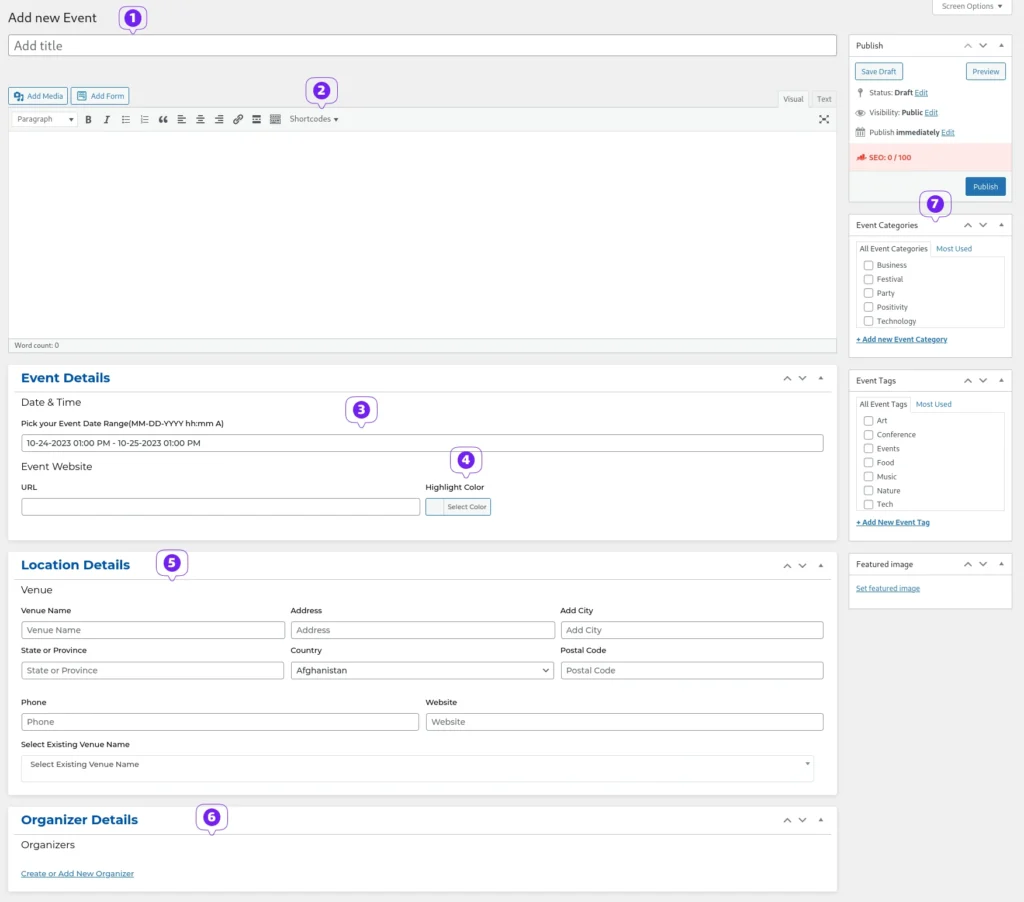
On this page, you will find various fields to fill in the event details. Let’s go through each of them:
- Title: Enter the title of your event.
- Description: Provide a detailed description of the event.
- Date and Time: Select the date and time of the event.
- Highlight Color: Choose a highlight color for the event.
- Location Details: Fill in the venue name, venue address, city, state, country, postal code, and phone number.
- Organizer Details: Enter the organizer’s name, email, website, and phone number.
- Categories and Tags: Assign relevant categories and tags to the event.

Step 4: Preview and Publish
Once you have filled in all the event details, click on the ‘Preview’ button to see how your event will look on the calendar. If everything looks good, click on the ‘Publish’ button to make the event live on your website.
Conclusion of Event Creation
Adding an event to the Events Calendar is a simple and straightforward process. By following the steps outlined in this guide, you can easily create and publish events on your website. So go ahead and start adding exciting events to engage your audience!
